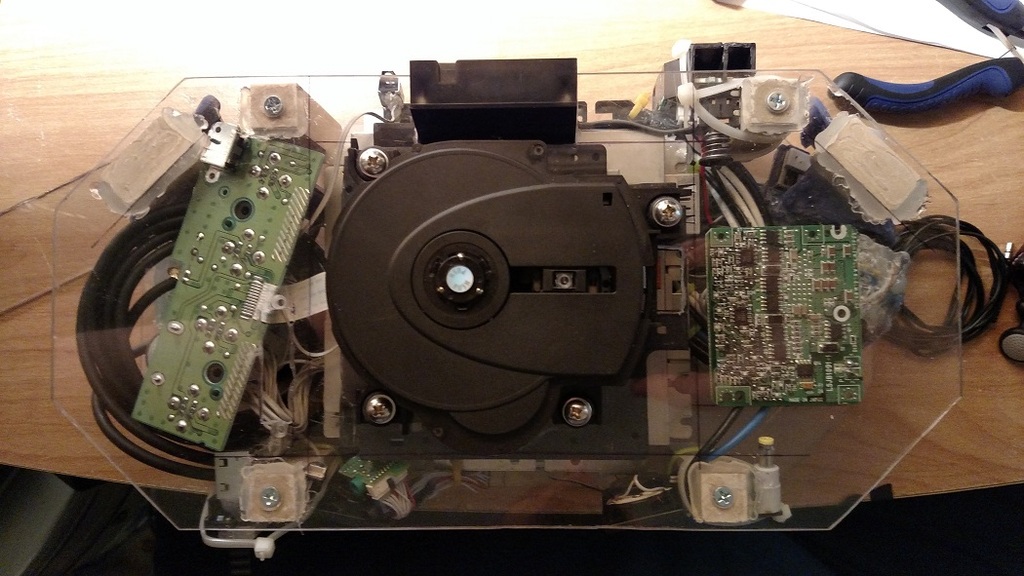
Finally starting to put all the pieces into the Lexan acrylic "Made by Hand" case. Everything went pretty smoothly getting everything to fit into place, it was working with and cutting the acrylic that SUCKED!! I knew it was going to be big with using OEM parts and the OEM fan so I decided a custom case would work best. It has been an interesting experience let me tell ya... the dust get EVERYWHERE. Note: Eye protection and a dust mask were a must for this.


There have been many redesigns on the case over the time I've been building it due to one thing or another but I think I have the final "look" down. Hopefully it will come out as nice as it is in my head... if not, at least it is comfortable, albeit a bit heavy, to play!!
The "Alpha" Stage:
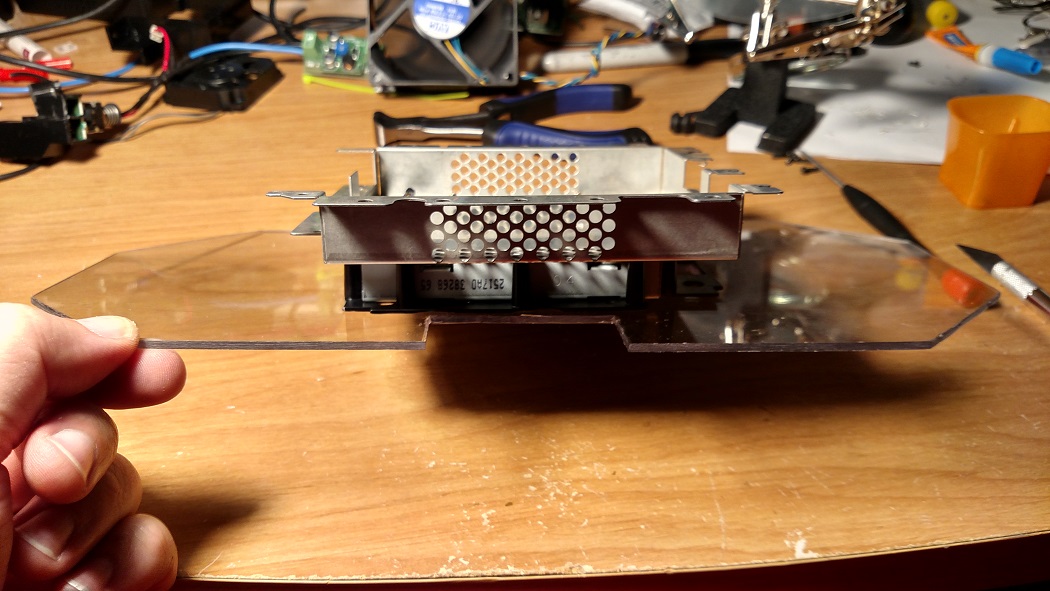
Ok, so the original plan had everything planned to be set into the case 180 degrees from how it ended up. This is so that the disc drive would fit under the "disc" sized PSOne screen but it just didn't work out that way. It was originally set to be totally squared off but I ditched that for the 45 degree angles and eventually completely rounded, (last two pics).
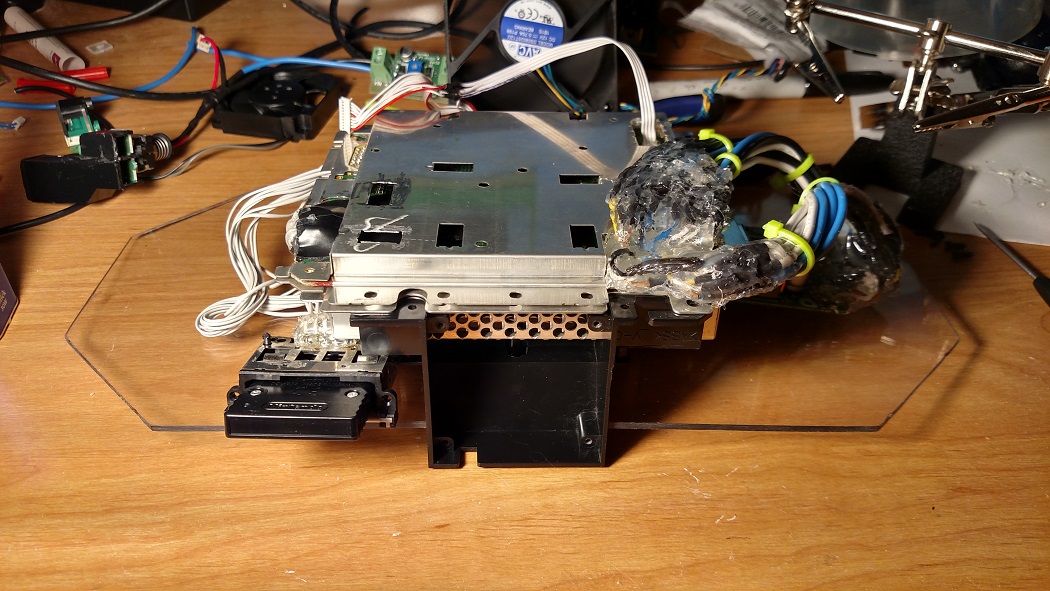
Like I said, a lot of changes went on as I worked around the OEM parts I used. Almost everything on this is modular and designed to come apart if repairs are needed and that was what made it so tricky. If something were to fail I could open it up, connect a standard controller and AV hookup to it to backup memory card data or just play it. This is the reason that it has all the extra wiring hanging out of it on the sides, testing and tweaking to make sure it is comfortable and working properly.
Anyway, the case is made from an .093in thick acrylic sheet with wooden supports and a lot of blood, sweat and tears. I plan on covering all the holes that aren't used to open the case with filler, sanding it down and painting it smooth. Just extra support to make the case more ridged. Please don't be too harsh, it is my first portable after all, lol!!
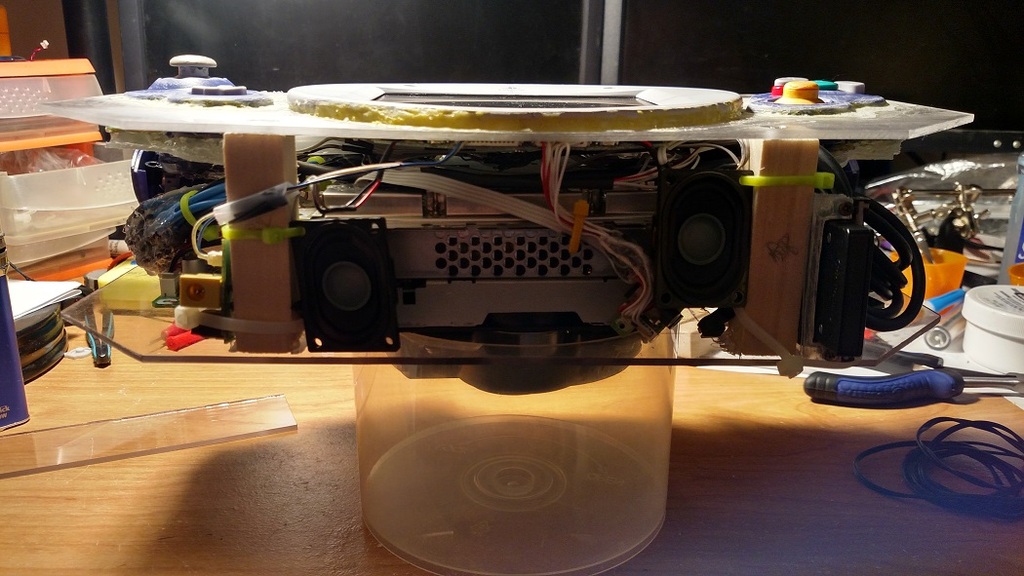
 Top
Top:
 Bottom Edge
: (Air Intake)
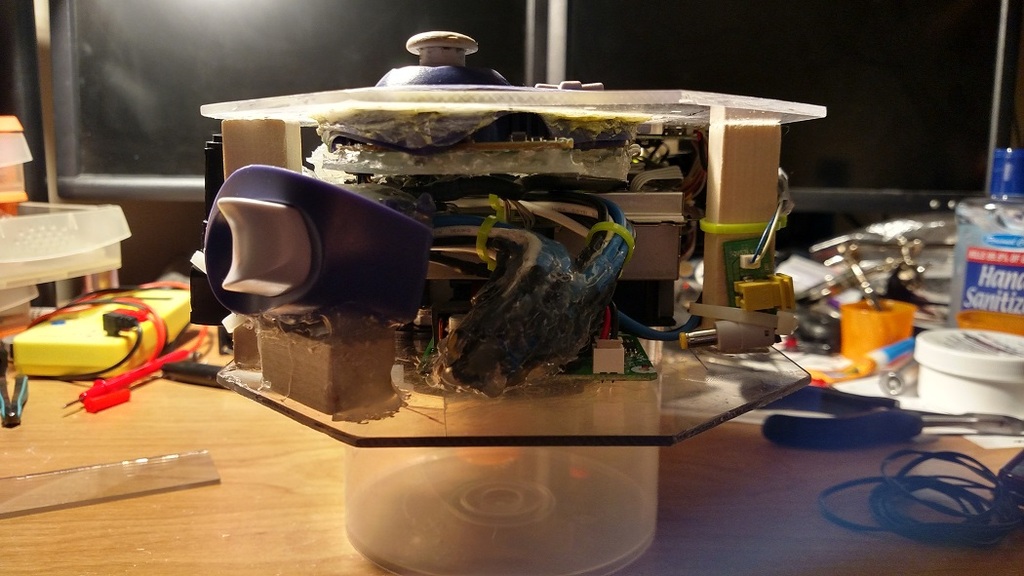
 Left Side Edge
:
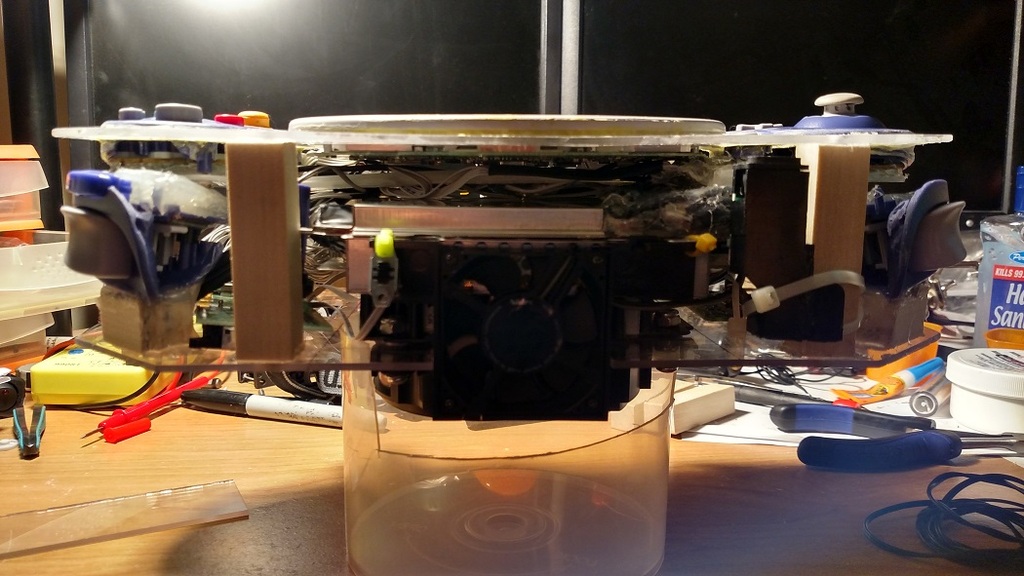
 Top Edge
: (Air Exhaust w/ OEM Fan)
 Right Side Edge
:
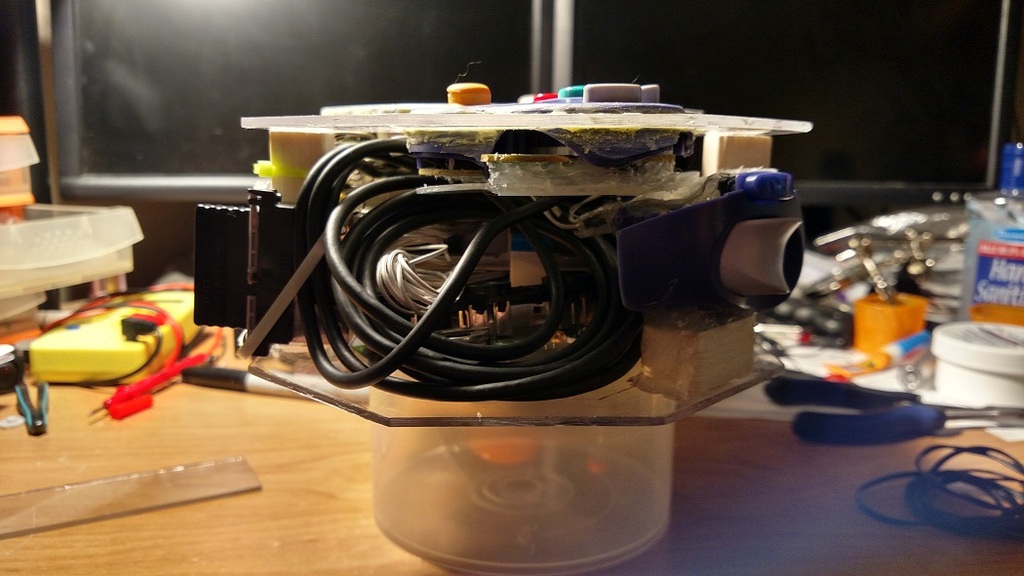 Back
Back:
______________________________________________________________________________________________________________
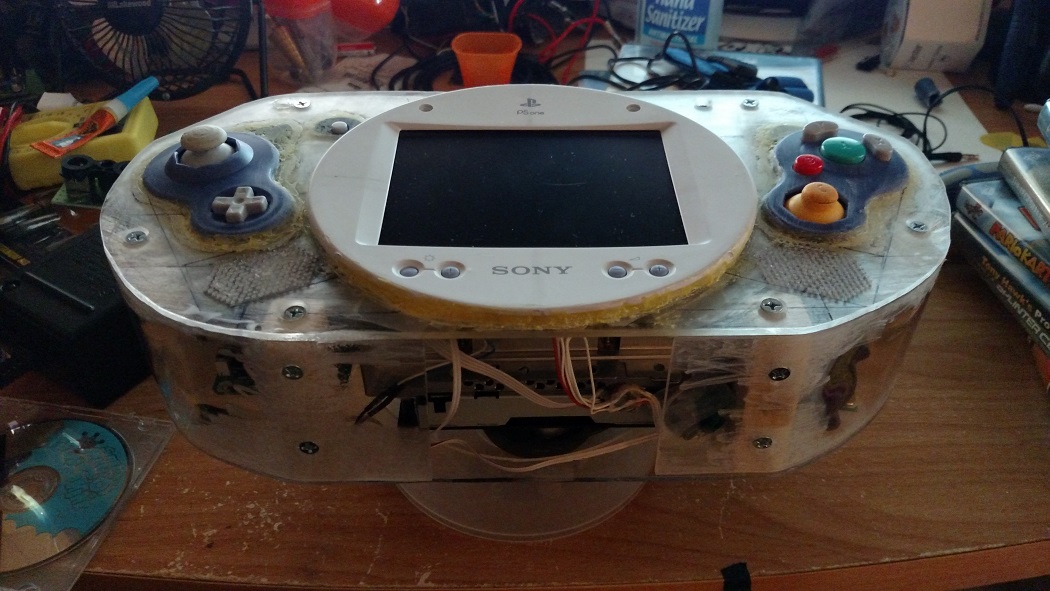
Beta Stage:
Here are the last two pics that will bring the project to it's current state. Here I have finalized most of the wiring, curved the sides and used my heat gun to shape the sides. Now is time to finalize switch positions, finish the Top and Bottom edges for air venting, sand/patch holes, finish the disc drive cover, smooth out the bumps and burses and paint it up!!
The one thing that I'm trying to figure out is the best way to have the case open up to get to the inside. I could leave the screws on the top face exposed so only the top comes off but I'm leaning toward physically cutting the case in half, sealing all the screws and making it "Clam Shell" open with screws holding it together on the sides. I think that the second option would give it a cleaner look and an easier way to work on anything if something breaks.
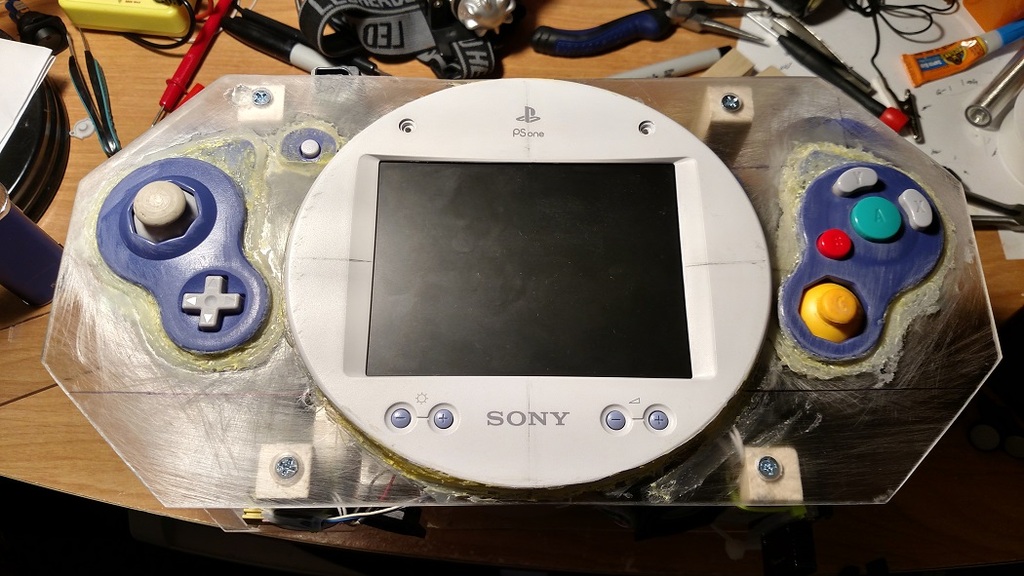
Current Status as of 09/2016:
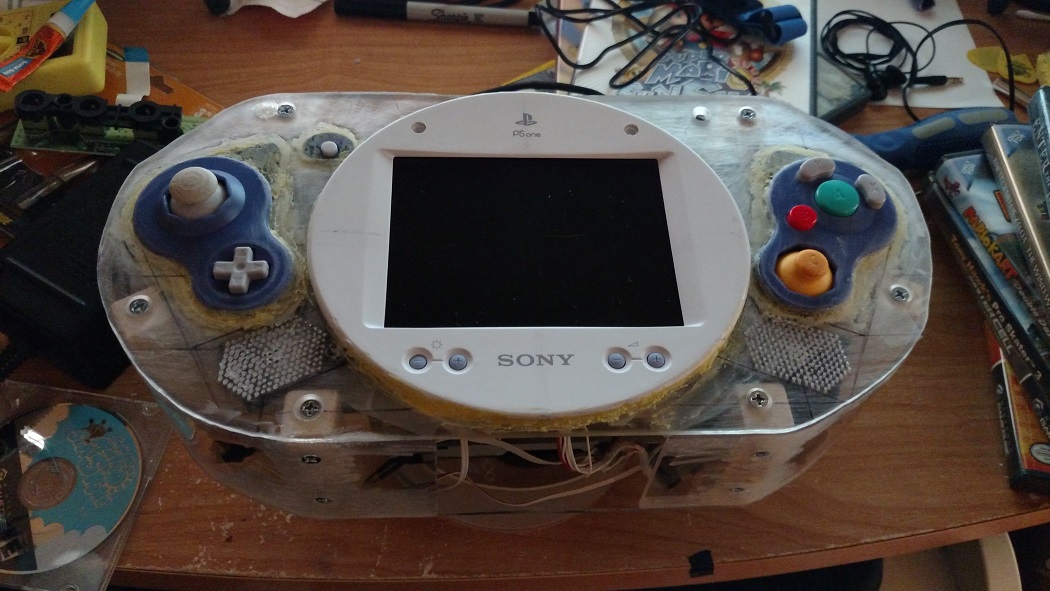
Let me know what you guys think or if there are any ideas so far. I'm open to suggestions on anything and constructive criticism.
I have been thinking about ditching the PSOne screen for a much better looking $20 backup camera that I got off eBay but there is A LOT of extra case work... any thoughts from anyone if it would be worth it? It is a much better picture but I would have to build an audio amp at that point. Just throwing that out there.
•Imagination is more important than knowledge. For knowledge is limited to all we now know and understand, while imagination embraces the entire world, and all there ever will be to know and understand. -Albert Einstein