Difference between revisions of "Game Boy Interface/Speedrunning Edition"
m (→Options) |
m (→"Can't Link") |
||
| (35 intermediate revisions by the same user not shown) | |||
| Line 60: | Line 60: | ||
| | | | ||
| L, R and Start Buttons | | L, R and Start Buttons | ||
| − | | Recalibrate | + | | Recalibrate controller |
|- | |- | ||
| | | | ||
| Line 66: | Line 66: | ||
| | | | ||
| | | | ||
| − | | Swap controls <br /> (Only with | + | | Swap controls <br /> (Only with controller adapter) |
|- | |- | ||
| | | | ||
| Line 160: | Line 160: | ||
| | | | ||
| L, R and Start Buttons | | L, R and Start Buttons | ||
| − | | Recalibrate | + | | Recalibrate controller |
|- | |- | ||
| | | | ||
| Line 166: | Line 166: | ||
| | | | ||
| | | | ||
| − | | Swap controls <br /> (Only with | + | | Swap controls <br /> (Only with controller adapter) |
|} | |} | ||
| Line 258: | Line 258: | ||
| | | | ||
| L, R and Start Buttons | | L, R and Start Buttons | ||
| − | | Recalibrate | + | | Recalibrate controller |
|- | |- | ||
| | | | ||
| Line 264: | Line 264: | ||
| | | | ||
| | | | ||
| − | | Swap controls <br /> (Only with | + | | Swap controls <br /> (Only with controller adapter) |
|- | |- | ||
| | | | ||
| Line 323: | Line 323: | ||
| | | | ||
| L, R and Start Buttons | | L, R and Start Buttons | ||
| − | | Recalibrate | + | | Recalibrate controller |
|- | |- | ||
| | | | ||
| Line 329: | Line 329: | ||
| | | | ||
| | | | ||
| − | | Swap controls <br /> (Only with | + | | Swap controls <br /> (Only with controller adapter) |
| + | |} | ||
| + | |||
| + | === Type E (swapped) === | ||
| + | |||
| + | {| class="wikitable" style="display: inline-table;" | ||
| + | |- | ||
| + | ! Nintendo GameCube | ||
| + | ! Nintendo GameCube Controller | ||
| + | ! Logitech Speed Force | ||
| + | ! Nintendo 64 Controller | ||
| + | ! Action | ||
| + | |- | ||
| + | | | ||
| + | | X or B/Y or A Buttons | ||
| + | | A/B Buttons or Accelerator/Brake Pedals | ||
| + | | A/B Buttons | ||
| + | | A/B Buttons | ||
| + | |- | ||
| + | | | ||
| + | | Z Button | ||
| + | | Y/Z Buttons | ||
| + | | Z Button | ||
| + | | Select | ||
| + | |- | ||
| + | | | ||
| + | | Start/Pause | ||
| + | | X Button or Start/Pause | ||
| + | | Start | ||
| + | | Start | ||
| + | |- | ||
| + | | | ||
| + | | +Control Pad or Control Stick | ||
| + | | +Control Pad or Steering Wheel | ||
| + | | +Control Pad or Control Stick | ||
| + | | +Control Pad | ||
| + | |- | ||
| + | | | ||
| + | | L/R Buttons | ||
| + | | L/R Buttons | ||
| + | | L/R Buttons | ||
| + | | L/R Buttons | ||
| + | |- | ||
| + | | Reset Button | ||
| + | | B, X and Start/Pause Buttons | ||
| + | | B, X and Start/Pause Buttons | ||
| + | | Z, R, A, B and Start Buttons | ||
| + | | Power Switch | ||
| + | |- | ||
| + | | Reset Button | ||
| + | | X, Y and Start/Pause Buttons <br /> (Hold for 1.5 seconds) | ||
| + | | | ||
| + | | L, R and Start Buttons | ||
| + | | Recalibrate controller | ||
| + | |- | ||
| + | | | ||
| + | | X, Y and Start/Pause Buttons <br /> (Hold for 3 seconds) | ||
| + | | | ||
| + | | | ||
| + | | Swap controls back <br /> (Only with controller adapter) | ||
| + | |- | ||
| + | | | ||
| + | | C Stick Down | ||
| + | | | ||
| + | | C Button Down | ||
| + | | Toggle input viewer | ||
|} | |} | ||
| Line 393: | Line 458: | ||
| '''3:''' | | '''3:''' | ||
| [[#Type D (The Legend of Zelda: A Link to the Past)|Type D (''The Legend of Zelda: A Link to the Past'')]] | | [[#Type D (The Legend of Zelda: A Link to the Past)|Type D (''The Legend of Zelda: A Link to the Past'')]] | ||
| + | |- | ||
| + | | '''4:''' | ||
| + | | [[#Type E (swapped)|Type E (swapped)]] | ||
|} | |} | ||
: Note: A Game Boy Advance used as a controller is a Nintendo GameCube Controller. | : Note: A Game Boy Advance used as a controller is a Nintendo GameCube Controller. | ||
| Line 416: | Line 484: | ||
: Overrides <code>--matrix</code>, <code>--input-gamma</code>, <code>--contrast</code>, <code>--brightness</code> and <code>--blend</code>. | : Overrides <code>--matrix</code>, <code>--input-gamma</code>, <code>--contrast</code>, <code>--brightness</code> and <code>--blend</code>. | ||
; {{anchor|--lut3d-order}}<code>--lut3d-order=<rgb|gbr|bgr></code> | ; {{anchor|--lut3d-order}}<code>--lut3d-order=<rgb|gbr|bgr></code> | ||
| − | : Specify lookup table order (default: | + | : Specify lookup table order (default: gbr). |
; {{anchor|--scaler}}<code>--scaler=<nearest|bilinear|area|box></code> | ; {{anchor|--scaler}}<code>--scaler=<nearest|bilinear|area|box></code> | ||
: Set image scaling filter (default: area). | : Set image scaling filter (default: area). | ||
: Note: Any filter other than nearest neighbor will incur a 4 scanlines delay. | : Note: Any filter other than nearest neighbor will incur a 4 scanlines delay. | ||
| − | ; {{anchor|--matrix}}<code>--matrix=<identity|gba | + | ; {{anchor|--matrix}}<code>--matrix=<identity|gba|gbi|nds|palm|psp|vba></code> |
: Set color matrix (default: gbi). | : Set color matrix (default: gbi). | ||
: This translates the RGB color primaries to the [[wikipedia:sRGB|standard RGB color space]]. | : This translates the RGB color primaries to the [[wikipedia:sRGB|standard RGB color space]]. | ||
| Line 429: | Line 497: | ||
| '''gba:''' | | '''gba:''' | ||
| [[#Game Boy Advance|Game Boy Advance]] (by [https://forums.libretro.com/t/real-gba-and-ds-phat-colors/1540 Pokefan531]) | | [[#Game Boy Advance|Game Boy Advance]] (by [https://forums.libretro.com/t/real-gba-and-ds-phat-colors/1540 Pokefan531]) | ||
| − | |||
| − | |||
| − | |||
|- | |- | ||
| '''gbi:''' | | '''gbi:''' | ||
| Line 496: | Line 561: | ||
|- | |- | ||
| '''non-interlace:''' | | '''non-interlace:''' | ||
| − | | 15kHz progressive | + | | 15kHz progressive, line halving |
|- | |- | ||
| '''non-progressive:''' | | '''non-progressive:''' | ||
| − | | 31kHz interlaced | + | | 31kHz interlaced, line doubling |
|- | |- | ||
| '''progressive:''' | | '''progressive:''' | ||
| Line 506: | Line 571: | ||
:; <code>clock2x</code>, <code>no-clock2x</code> | :; <code>clock2x</code>, <code>no-clock2x</code> | ||
:: Enable 27MHz pixel clock (default: auto). Enabling doubles the refresh rate for <code>interlace</code> scan modes. Disabling halves the refresh rate for <code>progressive</code> scan modes. | :: Enable 27MHz pixel clock (default: auto). Enabling doubles the refresh rate for <code>interlace</code> scan modes. Disabling halves the refresh rate for <code>progressive</code> scan modes. | ||
| − | :: This depend on a compatible video encoder not mangling its input. | + | :: This depend on a compatible [[wikipedia:Video encoder|video encoder]] or transmitter not mangling its input. |
:; <code>size2x</code>, <code>no-size2x</code> | :; <code>size2x</code>, <code>no-size2x</code> | ||
:: Enable 2× video oversampling (default: no). Enabling halves the refresh rate. | :: Enable 2× video oversampling (default: no). Enabling halves the refresh rate. | ||
| − | :: This depend on a compatible video encoder not mangling its input. | + | :: This depend on a compatible [[wikipedia:Video encoder|video encoder]] or transmitter not mangling its input. |
; {{anchor|--osd-input|--no-osd-input}}<code>--osd-input[=<x:y>]</code>, <code>--no-osd-input</code> | ; {{anchor|--osd-input|--no-osd-input}}<code>--osd-input[=<x:y>]</code>, <code>--no-osd-input</code> | ||
: Show input viewer (default: no). Defaults to 0:-64 if not specified. | : Show input viewer (default: no). Defaults to 0:-64 if not specified. | ||
| Line 584: | Line 649: | ||
File:GBISR ADV7604 GCHD Mk-II.png|GCVideo-DVI v2.4b and later | File:GBISR ADV7604 GCHD Mk-II.png|GCVideo-DVI v2.4b and later | ||
File:GBISR ADV7604 GCHD Mk-II v2.4c.2.png|{{nowrap|EON GCHD Mk-II v2.4c.2}} + {{nowrap|HDMI Cable}} | File:GBISR ADV7604 GCHD Mk-II v2.4c.2.png|{{nowrap|EON GCHD Mk-II v2.4c.2}} + {{nowrap|HDMI Cable}} | ||
| + | File:GBISR ADV7604 CARBY v3.0+.png|GCVideo-DVI v3.0 and later | ||
</gallery> | </gallery> | ||
| Line 600: | Line 666: | ||
|- | |- | ||
| [[:File:GBISR ADV7180 Composite NTSC.png|Nintendo Stereo AV Cable (NTSC-J)]] | | [[:File:GBISR ADV7180 Composite NTSC.png|Nintendo Stereo AV Cable (NTSC-J)]] | ||
| − | | -13. | + | | -13.735801 |
| − | | 9. | + | | 9.109952 |
| − | | 25. | + | | 25.914712 |
|- | |- | ||
| [[:File:GBISR ADV7180 Composite PAL-M.png|Nintendo Stereo AV Cable (PAL-M)]] | | [[:File:GBISR ADV7180 Composite PAL-M.png|Nintendo Stereo AV Cable (PAL-M)]] | ||
| − | | -13. | + | | -13.687564 |
| − | | 9. | + | | 9.302336 |
| − | | 25. | + | | 25.956162 |
|- | |- | ||
| [[:File:GBISR ADV7180 S-Video NTSC.png|Generic S-Video Cable (NTSC-J)]] | | [[:File:GBISR ADV7180 S-Video NTSC.png|Generic S-Video Cable (NTSC-J)]] | ||
| − | | -16. | + | | -16.615170 |
| − | | 9. | + | | 9.563781 |
| − | | 27. | + | | 27.243526 |
|- | |- | ||
| [[:File:GBISR ADV7180 S-Video PAL-M.png|Generic S-Video Cable (PAL-M)]] | | [[:File:GBISR ADV7180 S-Video PAL-M.png|Generic S-Video Cable (PAL-M)]] | ||
| − | | -15. | + | | -15.732351 |
| − | | 8. | + | | 8.832794 |
| − | | 26. | + | | 26.735124 |
|- | |- | ||
| [[:File:GBISR ADV7604 HDRV.png|HD Retrovision SNES Component Cable]] | | [[:File:GBISR ADV7604 HDRV.png|HD Retrovision SNES Component Cable]] | ||
| − | | - | + | | -20.902913 |
| − | | 12. | + | | 12.242264 |
| − | | 30. | + | | 30.766373 |
|- | |- | ||
| [[:File:GBISR ADV7604 GCHD Mk-II YUV.png|EON GCHD Mk-II + Datel Wii HD Component Cable]] | | [[:File:GBISR ADV7604 GCHD Mk-II YUV.png|EON GCHD Mk-II + Datel Wii HD Component Cable]] | ||
| − | | - | + | | -19.433354 |
| − | | | + | | 11.839451 |
| − | | | + | | 30.134315 |
|- | |- | ||
| [[:File:GBISR ADV7604 GCHD Mk-II YUV (2).png|EON GCHD Mk-II + HD Retrovision Wii Component Cable]] | | [[:File:GBISR ADV7604 GCHD Mk-II YUV (2).png|EON GCHD Mk-II + HD Retrovision Wii Component Cable]] | ||
| − | | -19. | + | | -19.840056 |
| − | | | + | | 11.989787 |
| − | | | + | | 30.125775 |
|- | |- | ||
| [[:File:GBISR ADV7604 GCHD Mk-II v2.4c.2 YUV.png|EON GCHD Mk-II v2.4c.2 + Datel Wii HD Component Cable]] | | [[:File:GBISR ADV7604 GCHD Mk-II v2.4c.2 YUV.png|EON GCHD Mk-II v2.4c.2 + Datel Wii HD Component Cable]] | ||
| − | | -20. | + | | -20.915182 |
| − | | 11. | + | | 11.946138 |
| − | | 30. | + | | 30.789679 |
|- | |- | ||
| [[:File:GBISR ADV7604 GCHD Mk-II v2.4c.2 YUV (2).png|EON GCHD Mk-II v2.4c.2 + HD Retrovision Wii Component Cable]] | | [[:File:GBISR ADV7604 GCHD Mk-II v2.4c.2 YUV (2).png|EON GCHD Mk-II v2.4c.2 + HD Retrovision Wii Component Cable]] | ||
| − | | - | + | | -21.778830 |
| − | | 12. | + | | 12.092403 |
| − | | 30. | + | | 30.922875 |
|- | |- | ||
| [[:File:GBISR ADV7604 Component.png|Nintendo GameCube Component Video Cable]] | | [[:File:GBISR ADV7604 Component.png|Nintendo GameCube Component Video Cable]] | ||
| − | | - | + | | -20.643052 |
| − | | 12. | + | | 12.475397 |
| − | | | + | | 30.409172 |
|- | |- | ||
| [[:File:GBISR ADV7604 GCHD.png|GCVideo-DVI v2.4a and earlier]] | | [[:File:GBISR ADV7604 GCHD.png|GCVideo-DVI v2.4a and earlier]] | ||
| − | | -21. | + | | -21.941242 |
| − | | 13. | + | | 13.828838 |
| − | | | + | | 31.589915 |
|- | |- | ||
| [[:File:GBISR ADV7604 GCHD Mk-II.png|GCVideo-DVI v2.4b and later]] | | [[:File:GBISR ADV7604 GCHD Mk-II.png|GCVideo-DVI v2.4b and later]] | ||
| − | | - | + | | -23.156373 |
| − | | | + | | 14.350793 |
| − | | | + | | 31.609022 |
|- | |- | ||
| [[:File:GBISR ADV7604 GCHD Mk-II v2.4c.2.png|EON GCHD Mk-II v2.4c.2 + HDMI Cable]] | | [[:File:GBISR ADV7604 GCHD Mk-II v2.4c.2.png|EON GCHD Mk-II v2.4c.2 + HDMI Cable]] | ||
| − | | '''- | + | | -23.506284 |
| − | | | + | | 14.096524 |
| − | | | + | | 30.832364 |
| + | |- | ||
| + | | [[:File:GBISR ADV7604 CARBY v3.0+.png|GCVideo-DVI v3.0 and later]] | ||
| + | | '''-24.573827''' | ||
| + | | '''15.201722''' | ||
| + | | '''32.208178''' | ||
| + | |} | ||
| + | |||
| + | ==== "Can't Link" ==== | ||
| + | |||
| + | Using MS2109. | ||
| + | |||
| + | <gallery widths="240px" heights="160px"> | ||
| + | File:GBISR MS2109 CARBY v3.0+ MJPEG.png|GCVideo-DVI v3.0 and later (MJPG) | ||
| + | File:GBISR MS2109 CARBY v3.0+.png|GCVideo-DVI v3.0 and later (YUY2) | ||
| + | </gallery> | ||
| + | |||
| + | {| class="mw-collapsible wikitable sortable" | ||
| + | |+ Measurements in dB | ||
| + | |- | ||
| + | ! Source | ||
| + | ! Lab DSSIM | ||
| + | ! RGB [[wikipedia:Structural similarity|SSIM]] | ||
| + | ! RGB [[wikipedia:Peak signal-to-noise ratio|PSNR]] | ||
| + | |- | ||
| + | | [[:File:GBISR MS2109 CARBY v3.0+ MJPEG.png|GCVideo-DVI v3.0 and later (MJPG)]] | ||
| + | | -18.031204 | ||
| + | | 10.982781 | ||
| + | | '''28.875378''' | ||
| + | |- | ||
| + | | [[:File:GBISR MS2109 CARBY v3.0+.png|GCVideo-DVI v3.0 and later (YUY2)]] | ||
| + | | '''-18.259393''' | ||
| + | | '''11.301660''' | ||
| + | | 28.853936 | ||
|} | |} | ||
| Line 685: | Line 784: | ||
File:GBISR AD9887A GCHD Mk-II.png|GCVideo-DVI v2.4b and later | File:GBISR AD9887A GCHD Mk-II.png|GCVideo-DVI v2.4b and later | ||
File:GBISR AD9887A GCHD Mk-II v2.4c.2.png|{{nowrap|EON GCHD Mk-II v2.4c.2}} + {{nowrap|HDMI Cable}} | File:GBISR AD9887A GCHD Mk-II v2.4c.2.png|{{nowrap|EON GCHD Mk-II v2.4c.2}} + {{nowrap|HDMI Cable}} | ||
| + | File:GBISR AD9887A CARBY v3.0+.png|GCVideo-DVI v3.0 and later | ||
</gallery> | </gallery> | ||
| Line 788: | Line 888: | ||
| '''18.384225''' | | '''18.384225''' | ||
| '''34.898211''' | | '''34.898211''' | ||
| + | |- | ||
| + | | [[:File:GBISR AD9887A CARBY v3.0+.png|GCVideo-DVI v3.0 and later]] | ||
| + | | -24.562620 | ||
| + | | 15.630643 | ||
| + | | 32.150042 | ||
|} | |} | ||
| Line 840: | Line 945: | ||
File:GBI AGSE Identity.png|Identity matrix | File:GBI AGSE Identity.png|Identity matrix | ||
File:GBI AGSE GBA.png|Game Boy Advance | File:GBI AGSE GBA.png|Game Boy Advance | ||
| − | |||
File:GBI AGSE GBI.png|Game Boy Interface | File:GBI AGSE GBI.png|Game Boy Interface | ||
File:GBI AGSE NDS.png|Nintendo DS | File:GBI AGSE NDS.png|Nintendo DS | ||
| Line 853: | Line 957: | ||
File:GBI AMKE Identity.png|Identity matrix | File:GBI AMKE Identity.png|Identity matrix | ||
File:GBI AMKE GBA.png|Game Boy Advance | File:GBI AMKE GBA.png|Game Boy Advance | ||
| − | |||
File:GBI AMKE GBI.png|Game Boy Interface | File:GBI AMKE GBI.png|Game Boy Interface | ||
File:GBI AMKE NDS.png|Nintendo DS | File:GBI AMKE NDS.png|Nintendo DS | ||
| Line 866: | Line 969: | ||
File:GBI AXPE Identity.png|Identity matrix | File:GBI AXPE Identity.png|Identity matrix | ||
File:GBI AXPE GBA.png|Game Boy Advance | File:GBI AXPE GBA.png|Game Boy Advance | ||
| − | |||
File:GBI AXPE GBI.png|Game Boy Interface | File:GBI AXPE GBI.png|Game Boy Interface | ||
File:GBI AXPE NDS.png|Nintendo DS | File:GBI AXPE NDS.png|Nintendo DS | ||
| Line 879: | Line 981: | ||
File:GBI BZME Identity.png|Identity matrix | File:GBI BZME Identity.png|Identity matrix | ||
File:GBI BZME GBA.png|Game Boy Advance | File:GBI BZME GBA.png|Game Boy Advance | ||
| − | |||
File:GBI BZME GBI.png|Game Boy Interface | File:GBI BZME GBI.png|Game Boy Interface | ||
File:GBI BZME NDS.png|Nintendo DS | File:GBI BZME NDS.png|Nintendo DS | ||
| Line 892: | Line 993: | ||
File:GBI AWAE Identity.png|Identity matrix | File:GBI AWAE Identity.png|Identity matrix | ||
File:GBI AWAE GBA.png|Game Boy Advance | File:GBI AWAE GBA.png|Game Boy Advance | ||
| − | |||
File:GBI AWAE GBI.png|Game Boy Interface | File:GBI AWAE GBI.png|Game Boy Interface | ||
File:GBI AWAE NDS.png|Nintendo DS | File:GBI AWAE NDS.png|Nintendo DS | ||
| Line 996: | Line 1,096: | ||
Included as <code>gbisr.cli.example</code>. | Included as <code>gbisr.cli.example</code>. | ||
| + | Transcribed below for reference. | ||
<pre> | <pre> | ||
| Line 1,073: | Line 1,174: | ||
=== Video optimization === | === Video optimization === | ||
| + | |||
| + | ==== Datapath VisionAV & VisionRGB ==== | ||
| + | |||
| + | ===== GCVideo-DVI v3.0 and later ===== | ||
| + | |||
| + | These settings provide a 1× scaled image in a 4:3 640×240p119.455 video output. | ||
| + | |||
| + | In the GCVideo menu under "Other settings", set "Enhanced DVI mode" to On. <br /> | ||
| + | In the GCVideo menu under "Advanced settings", set "Chroma Interpolation" to On, "Fix resolution" to Off, and "Digital color format" to YC444. | ||
| + | |||
| + | <pre> | ||
| + | --vfilter=.5:.5:.0:.5:.0:.5 | ||
| + | --format=custom,offset=0,scaled-size=0:0 | ||
| + | --scan-mode=non-interlace,clock2x | ||
| + | </pre> | ||
| + | |||
| + | * Color Adjustments | ||
| + | ** Brightness: 32 | ||
| + | ** Contrast: 128 | ||
| + | ** Colour Domain: YUV (601) Limited | ||
==== Datapath VisionRGB ==== | ==== Datapath VisionRGB ==== | ||
===== Nintendo GameCube Component Video Cable ===== | ===== Nintendo GameCube Component Video Cable ===== | ||
| + | |||
| + | These settings provide a 1× scaled image in a 3:2 240p119.455 video output. | ||
<pre> | <pre> | ||
| Line 1,118: | Line 1,241: | ||
==== Open Source Scan Converter ==== | ==== Open Source Scan Converter ==== | ||
| + | |||
| + | These settings provide a 1× scaled image in a 3:2 240p59.7276 video output. | ||
| + | Refer to [http://www.firebrandx.com/gbiosscoptimal.html FirebrandX] for Open Source Scan Converter configuration. | ||
Included as <code>gbisr-ossc.cli</code>, <code>gbisr-ossc.dol+cli</code> and <code>gbisr-ossc.gci</code>. | Included as <code>gbisr-ossc.cli</code>, <code>gbisr-ossc.dol+cli</code> and <code>gbisr-ossc.gci</code>. | ||
| − | + | Transcribed below for reference. | |
<pre> | <pre> | ||
| Line 1,127: | Line 1,253: | ||
--scan-mode=non-interlace | --scan-mode=non-interlace | ||
</pre> | </pre> | ||
| + | |||
| + | Important: Misuse will result in the wrong aspect ratio. | ||
==== XRGB-mini Framemeister ==== | ==== XRGB-mini Framemeister ==== | ||
| + | |||
| + | These settings provide a 1× scaled image in a 3:2 240p59.7387 video output. | ||
| + | Refer to [http://www.firebrandx.com/framemeisterprofiles.html FirebrandX] for XRGB-mini Framemeister configuration. | ||
Included as <code>gbisr-xrgb.cli</code>, <code>gbisr-xrgb.dol+cli</code> and <code>gbisr-xrgb.gci</code>. | Included as <code>gbisr-xrgb.cli</code>, <code>gbisr-xrgb.dol+cli</code> and <code>gbisr-xrgb.gci</code>. | ||
| − | + | Transcribed below for reference. | |
<pre> | <pre> | ||
| Line 1,138: | Line 1,269: | ||
--scan-mode=non-interlace | --scan-mode=non-interlace | ||
</pre> | </pre> | ||
| + | |||
| + | Important: Misuse will result in the wrong aspect ratio. | ||
==== High-definition televisions ==== | ==== High-definition televisions ==== | ||
| Line 1,143: | Line 1,276: | ||
===== GCVideo-DVI ===== | ===== GCVideo-DVI ===== | ||
| − | + | These settings provide a 3× scaled image, line doubled in a 16:9 720×960i59.7188 video output. | |
Included as <code>gbisr-gcdv.cli</code>, <code>gbisr-gcdv.dol+cli</code> and <code>gbisr-gcdv.gci</code>. | Included as <code>gbisr-gcdv.cli</code>, <code>gbisr-gcdv.dol+cli</code> and <code>gbisr-gcdv.gci</code>. | ||
| + | Transcribed below for reference. | ||
| + | |||
| + | [[File:GBISR-GCDV.png|thumb]] | ||
<pre> | <pre> | ||
| Line 1,159: | Line 1,295: | ||
Labeling the input on the television as a PC may also work. | Labeling the input on the television as a PC may also work. | ||
| + | |||
| + | ---- | ||
| + | |||
| + | These settings provide a 3× scaled image in a 16:9 720×480p59.7276 video output. | ||
| + | |||
| + | <pre> | ||
| + | --zoom=2.53125:3 | ||
| + | --format=custom,offset=0,scaled-size=0:0 | ||
| + | --scan-mode=progressive | ||
| + | </pre> | ||
| + | |||
| + | Change the Aspect Ratio on the television to 16:9. | ||
=== Video output === | === Video output === | ||
| Line 1,238: | Line 1,386: | ||
=== Can I play [[wikipedia:Game Boy Advance Video|Game Boy Advance Video]]? === | === Can I play [[wikipedia:Game Boy Advance Video|Game Boy Advance Video]]? === | ||
| − | Yes. You can do so by disabling [[#--no-enhance|Game Boy Player enhancements]] (<code>--no-enhance</code>), or holding a direction while the Game Boy Player logo is visible. | + | Yes. You can do so by disabling [[#--no-enhance|Game Boy Player enhancements]] (<code>--no-enhance</code>, or "Rumble: No" in Swiss), or holding a direction while the Game Boy Player logo is visible. |
| + | |||
| + | === What is the default video output? === | ||
| + | |||
| + | * Interlaced Scan Mode: 1× in 4:3 720×240p59.8261 (reported by GCVideo-DVI as 704x240p60) | ||
| + | * Progressive Scan Mode: 2× in 4:3 720×480p59.7276 (reported by GCVideo-DVI as 704x480p60) | ||
=== Why am I seeing a double split image? === | === Why am I seeing a double split image? === | ||
| Line 1,289: | Line 1,442: | ||
== Changelog == | == Changelog == | ||
| + | |||
| + | === January, 2021 === | ||
| + | |||
| + | * Added all devices search for GBI directory. | ||
| + | * Updated GBA-as-GC controller. | ||
| + | * Improved GBA multiboot support. | ||
| + | |||
| + | === December, 2020 === | ||
| + | |||
| + | * Added return to loader support. | ||
| + | * Updated color matrices by Pokefan531. | ||
| + | * Updated 3D LUTs by Pokefan531. | ||
| + | * Improved system stability. | ||
| + | * Improved SD card compatibility. | ||
| + | * Changed default video format to avoid PAL-M with digital AV. | ||
| + | * Changed default 3D LUT order to GBR. | ||
| + | |||
| + | === May–June, 2020 === | ||
| + | |||
| + | * Added control type E. | ||
| + | * Added disc spin-down. | ||
| + | * Added GC Loader read-only support. | ||
=== April, 2020 === | === April, 2020 === | ||
| Line 1,294: | Line 1,469: | ||
* Changed default color matrix to GBI's original. | * Changed default color matrix to GBI's original. | ||
* Changed default sound mode to analog. | * Changed default sound mode to analog. | ||
| + | * Fixed Game Boy Player settings validation. | ||
=== January–March, 2020 === | === January–March, 2020 === | ||
Revision as of 19:24, 24 January 2021
| Information | |
|---|---|
| Author(s) | Extrems |
| Type | Utility |
| Version | Rolling release |
| Licence | All rights reserved |
| Links | |
|
Download main package Download extra package | |
| Website | |
| Discussion | |
| Source | |
| This software must not be sold, neither alone nor as part of a bundle. If you paid for this software or received it as part of a bundle following payment, you have been scammed and should demand your money back immediately. |
| Firmware update notice for GCVideo products. It is strongly recommended to update to GCVideo-DVI v3.0 or later before using this software. GCVideo Lite products are not recommended under any circumstances. |

Formerly the (ultra-)low latency version, Game Boy Interface Speedrunning Edition (GBISR) features a simplified video renderer, and aims to meet the needs of most speedrunning communities.
Controls
Type A (two-handed)
| Nintendo GameCube | Nintendo GameCube Controller | Logitech Speed Force | Nintendo 64 Controller | Action |
|---|---|---|---|---|
| A/B Buttons | A/B Buttons or Accelerator/Brake Pedals | A/B Buttons | A/B Buttons | |
| Y/Z Buttons | Y/Z Buttons | Z Button | Select | |
| X Button or Start/Pause | X Button or Start/Pause | Start | Start | |
| +Control Pad or Control Stick | +Control Pad or Steering Wheel | +Control Pad or Control Stick | +Control Pad | |
| L/R Buttons | L/R Buttons | L/R Buttons | L/R Buttons | |
| Reset Button | B, X and Start/Pause Buttons | B, X and Start/Pause Buttons | Z, R, A, B and Start Buttons | Power Switch |
| Reset Button | X, Y and Start/Pause Buttons (Hold for 1.5 seconds) |
L, R and Start Buttons | Recalibrate controller | |
| X, Y and Start/Pause Buttons (Hold for 3 seconds) |
Swap controls (Only with controller adapter) | |||
| C Stick Down | C Button Down | Toggle input viewer |
| DK Bongos Controller | Active Life Mat Controller | Action |
|---|---|---|
| Bottom Right/Left | Orange Up/Right | A/B Buttons |
| Hand Clap | - Button | Select |
| Start/Pause | + Button | Start |
| Top Right | Blue or Orange Square | +Control Pad Right |
| Top Left | Blue Left | +Control Pad Left |
| Blue Up | +Control Pad Up | |
| Blue or Orange Down | +Control Pad Down |
Type B (one-handed)
| Nintendo GameCube | Nintendo GameCube Controller | Logitech Speed Force | Nintendo 64 Controller | Action |
|---|---|---|---|---|
| A/B Buttons | A/B Buttons or Accelerator/Brake Pedals | A/B Buttons | A/B Buttons | |
| L/Z Buttons | Y/Z Buttons | L/Z Buttons | Select | |
| R Button or Start/Pause | X Button or Start/Pause | R Button or Start | Start | |
| +Control Pad, Control Stick or C Stick | +Control Pad or Steering Wheel | +Control Pad, Control Stick or C Buttons | +Control Pad | |
| Y/X Buttons | L/R Buttons | L/R Buttons | ||
| Reset Button | B, X and Start/Pause Buttons | B, X and Start/Pause Buttons | Z, R, A, B and Start Buttons | Power Switch |
| Reset Button | X, Y and Start/Pause Buttons (Hold for 1.5 seconds) |
L, R and Start Buttons | Recalibrate controller | |
| X, Y and Start/Pause Buttons (Hold for 3 seconds) |
Swap controls (Only with controller adapter) |
| DK Bongos Controller | Active Life Mat Controller | Action |
|---|---|---|
| Bottom Right/Left | Orange Up/Right | A/B Buttons |
| Hand Clap | - Button | Select |
| Start/Pause | + Button | Start |
| Blue or Orange Square | +Control Pad Right | |
| Blue Left | +Control Pad Left | |
| Blue Up | +Control Pad Up | |
| Blue or Orange Down | +Control Pad Down | |
| Top Left/Right | L/R Buttons |
Type C (Super Mario World: Super Mario Advance 2)
| Nintendo GameCube | Nintendo GameCube Controller | Logitech Speed Force | Nintendo 64 Controller | Action |
|---|---|---|---|---|
| B/Y or X Buttons | A/B Buttons or Accelerator/Brake Pedals | A/B Buttons | A/B Buttons | |
| Z Button | Y/Z Buttons | Z Button | Select | |
| Start/Pause | X Button or Start/Pause | Start | Start | |
| +Control Pad or Control Stick | +Control Pad or Steering Wheel | +Control Pad or Control Stick | +Control Pad | |
| L/R or A Buttons | L/R Buttons | L/R Buttons | L/R Buttons | |
| Reset Button | B, X and Start/Pause Buttons | B, X and Start/Pause Buttons | Z, R, A, B and Start Buttons | Power Switch |
| Reset Button | X, Y and Start/Pause Buttons (Hold for 1.5 seconds) |
L, R and Start Buttons | Recalibrate controller | |
| X, Y and Start/Pause Buttons (Hold for 3 seconds) |
Swap controls (Only with controller adapter) | |||
| C Stick Down | C Button Down | Toggle input viewer |
Type D (The Legend of Zelda: A Link to the Past)
| Nintendo GameCube | Nintendo GameCube Controller | Logitech Speed Force | Nintendo 64 Controller | Action |
|---|---|---|---|---|
| Y/B Buttons | A/B Buttons or Accelerator/Brake Pedals | A/B Buttons | A/B Buttons | |
| R Button or Start/Pause | Y/Z Buttons | L/Z Buttons | Select | |
| L/Z Buttons | X Button or Start/Pause | R Button or Start | Start | |
| +Control Pad, Control Stick or C Stick | +Control Pad or Steering Wheel | +Control Pad, Control Stick or C Buttons | +Control Pad | |
| X/A Buttons | L/R Buttons | L/R Buttons | ||
| Reset Button | B, X and Start/Pause Buttons | B, X and Start/Pause Buttons | Z, R, A, B and Start Buttons | Power Switch |
| Reset Button | X, Y and Start/Pause Buttons (Hold for 1.5 seconds) |
L, R and Start Buttons | Recalibrate controller | |
| X, Y and Start/Pause Buttons (Hold for 3 seconds) |
Swap controls (Only with controller adapter) |
Type E (swapped)
| Nintendo GameCube | Nintendo GameCube Controller | Logitech Speed Force | Nintendo 64 Controller | Action |
|---|---|---|---|---|
| X or B/Y or A Buttons | A/B Buttons or Accelerator/Brake Pedals | A/B Buttons | A/B Buttons | |
| Z Button | Y/Z Buttons | Z Button | Select | |
| Start/Pause | X Button or Start/Pause | Start | Start | |
| +Control Pad or Control Stick | +Control Pad or Steering Wheel | +Control Pad or Control Stick | +Control Pad | |
| L/R Buttons | L/R Buttons | L/R Buttons | L/R Buttons | |
| Reset Button | B, X and Start/Pause Buttons | B, X and Start/Pause Buttons | Z, R, A, B and Start Buttons | Power Switch |
| Reset Button | X, Y and Start/Pause Buttons (Hold for 1.5 seconds) |
L, R and Start Buttons | Recalibrate controller | |
| X, Y and Start/Pause Buttons (Hold for 3 seconds) |
Swap controls back (Only with controller adapter) | |||
| C Stick Down | C Button Down | Toggle input viewer |
Options
--offset=<x:y>- Set offset (default: 0).
--zoom=<x:y>- Set zoom (default: 2.0).
--rotate=<0-359>- Set rotation (default: 0).
--poll=<0-11>- Set controller polling rate. Use if your third-party controller or controller adapter is malfunctioning.
0: VSync (most compatible) 1: 1000Hz (default) 2: 500Hz 3: 350Hz 4: 300Hz 5: 250Hz 6: 200Hz 7: 150Hz 8: 150Hz 9: 125Hz 10: 125Hz 11: 100Hz
--control=<P1[:P2[:P3[:P4]]]>- Set control scheme. The default is the Game Boy Player Start-up Disc's Controller setting (0 or 1).
0: Type A (two-handed) 1: Type B (one-handed) 2: Type C (Super Mario World: Super Mario Advance 2) 3: Type D (The Legend of Zelda: A Link to the Past) 4: Type E (swapped)
- Note: A Game Boy Advance used as a controller is a Nintendo GameCube Controller.
--delay-reset=<N>- Set reset delay (default: 73).
--delay-video=<N>- Set video buffering (default: 1).
--movie=<path>,--no-movie- Play input log (default: no).
--movie-record,--no-movie-record- Record input log (default: no).
--overlay=<path>,--no-overlay- Load texture palette (default: frame-srgb.tpl.gz).
--overlay-id=<ID>- Set texture palette index. The default is the Game Boy Player Start-up Disc's Frame setting (0 to 19).
--overlay-scale=<x:y>- Set texture scale (default: auto).
--palette=<xxxx-xxxx-xxxx>,--no-palette- Apply Super Game Boy color palette (default: no).
- Note: Press Left + B while the Game Boy logo is visible for proper application on original Game Boy Game Paks.
--lut3d=<path>,--no-lut3d- Load 32x32x32 lookup table in PNG file format (default: no).
- Overrides
--matrix,--input-gamma,--contrast,--brightnessand--blend. --lut3d-order=<rgb|gbr|bgr>- Specify lookup table order (default: gbr).
--scaler=<nearest|bilinear|area|box>- Set image scaling filter (default: area).
- Note: Any filter other than nearest neighbor will incur a 4 scanlines delay.
--matrix=<identity|gba|gbi|nds|palm|psp|vba>- Set color matrix (default: gbi).
- This translates the RGB color primaries to the standard RGB color space.
identity: Identity matrix gba: Game Boy Advance (by Pokefan531) gbi: Game Boy Interface nds: Nintendo DS (by Pokefan531) palm: Palm Treo 700p (by Pokefan531) psp: PlayStation Portable (by Pokefan531) vba: VisualBoyAdvance-M (by Pokefan531)
--input-gamma=<red[:green[:blue]]>- Set gamma (default: 2.2).
--output-gamma=<value>- Specify screen gamma (default: 2.2).
--gamma=<even[:odd]>- Set gamma correction (default: 1.0).
--contrast=<red[:green[:blue]]>- Set gain (default: 1.0).
--brightness=<red[:green[:blue]]>- Set lift (default: 0.0).
--blend=<value>- Set alpha blending with accumulation buffer (default: 1.0).
--background=<#rrggbb>- Set background color (default: #000000).
--vfilter=<middle[:lower[:upper]]>- Set vertical filter coefficients (default: 1.0).
- Each lines are the sum of line n, n+1 and n-1.
--volume=<left[:right]>- Set audio gain (default: 0.75).
- Note: GCVideo-DVI v2.4b and earlier reduces volume down to a quarter.
--sound=<[mono|stereo][,digital|analog]>- Set sound mode. The default is the Sound Mode system setting (mono or stereo).
digital- Use PWM decoder.
analog[=<a0:a1:a2:b1:b2>]- Use 2MHz biquad filter (default). Defaults to a second-order low-pass filter with a cut-off of 10kHz and a quality factor of √2 if not specified.
- This is used to simulate the RLC circuit on the Game Boy Advance's Headphone Jack, providing a treble boost.
--format=<[ntsc|pal|pal-m|ntsc-50|pal-60|custom|custom-m][,offset=<x:y>][,scaled-size=<w:h>][,size=<w:h>]>- Set video format. The default is the Video Mode or Progressive Scan Mode system setting (ntsc, pal-60, pal-m, or custom).
- Note: GCVideo-DVI is only designed to support NTSC, PAL and PAL-60.
offset=<x:y>- Set screen position. The default is the Screen Position system setting (-32 to +32).
- Note: Odd positions will cause CB to be shifted right and CR to be shifted left with GCVideo-Lite or GCVideo-DVI v2.4c and earlier.
The screen position is shifted left by 4 pixels with GCVideo-DVI v2.4d and earlier. scaled-size=<w:h>- Set screen size. The default is 704:480 for 60Hz formats and 704:576 for 50Hz formats.
- Note: 3 pixels on the right edge of the screen are blanked out with GCVideo-DVI v2.4d-2 and earlier.
size=<w:h>- Set internal resolution (default: 640:480). The maximum is 640:528.
--scan-mode=<[interlace|quasi-interlace|non-interlace|non-progressive|progressive][,clock2x|no-clock2x][,size2x|no-size2x]>- Set scan mode. The default is the Progressive Scan Mode system setting (non-interlace or progressive).
interlace: 15kHz interlaced quasi-interlace: 15kHz segmented frame non-interlace: 15kHz progressive, line halving non-progressive: 31kHz interlaced, line doubling progressive: 31kHz progressive
clock2x,no-clock2x- Enable 27MHz pixel clock (default: auto). Enabling doubles the refresh rate for
interlacescan modes. Disabling halves the refresh rate forprogressivescan modes. - This depend on a compatible video encoder or transmitter not mangling its input.
size2x,no-size2x- Enable 2× video oversampling (default: no). Enabling halves the refresh rate.
- This depend on a compatible video encoder or transmitter not mangling its input.
--osd-input[=<x:y>],--no-osd-input- Show input viewer (default: no). Defaults to 0:-64 if not specified.
- The position is relative to the center of the Game Boy screen, and may not exceed its boundaries.
--osd-input=-96:-64Show on top left.--osd-input=96:-64Show on top right.--osd-input=96:64Show on bottom right.--osd-input=-96:64Show on bottom left.
--usb,--no-usb- Enable USB Gecko features (default: yes).
--enhance,--no-enhance- Enable Game Boy Player enhancements (default: no). Enabling this option is not recommended.
Title Feature(s) Drill Dozer Rumble Game Boy Advance Video Series Not compatible Mario & Luigi: Superstar Saga Rumble, reduced contrast Pokémon Pinball: Ruby & Sapphire Rumble Shikakui Atama o Maru Kusuru Advance: Kanji Keisanhen Rumble, restored contrast Shikakui Atama o Maru Kusuru Advance: Kokugo Sansuu Shakai Rikahen Rumble, restored contrast Super Mario Advance 4: Super Mario Bros. 3 Rumble, restored gamma
- Note: Remove any accessory from the External Extension Connector, or the Rumble Feature will not work.
- Note: If you're using an EverDrive-GBA, make sure to turn off Quick Boot in the options, or the enhancements may not work.
<path>- Load Game Boy Advance multi-bootable ROM. Using this option is not recommended.
- Note: Remove any accessory from the External Extension Connector. Hold Start + Select while the Game Boy logo is visible.
Any file path can be relative or absolute. If relative, it is relative to /GBI. They can also explicitly specify the SD card to read from by prefixing an absolute path with carda: or cardb:
Comparisons
Video quality
These results are applicable to Nintendo GameCube software.
Using DSSIM 2.9.7 and FFmpeg 4.2 for RGB SSIM & PSNR, with this reference image.
The analog-to-digital conversion parameters were calibrated for each source and device pair.
This isn't representative of relative signal strength. Sorting by DSSIM provide a fairly accurate ranking.
Blackmagic Intensity Shuttle
This 10-bit YCBCR 4:2:2 capture device is most representative of what you might see on a digital television.
As chroma is shifted right on YPBPR in/out, this was corrected in post-processing. Video and S-Video in/out suffer from internal interference.

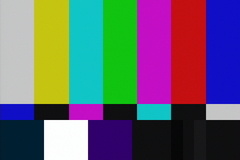
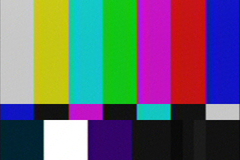
Nintendo Stereo AV Cable (NTSC-J)

Nintendo Stereo AV Cable (PAL-M)

Generic S-Video Cable (NTSC-J) [1]

Generic S-Video Cable (PAL-M) [1]

HD Retrovision SNES Component Cable

EON GCHD Mk-II + Datel Wii HD Component Cable

EON GCHD Mk-II + HD Retrovision Wii Component Cable

EON GCHD Mk-II v2.4c.2 + Datel Wii HD Component Cable

EON GCHD Mk-II v2.4c.2 + HD Retrovision Wii Component Cable

Nintendo GameCube Component Video Cable

GCVideo-DVI v2.4a and earlier [2]

GCVideo-DVI v2.4b and later

EON GCHD Mk-II v2.4c.2 + HDMI Cable

GCVideo-DVI v3.0 and later


.png)

.png)


"Can't Link"
Using MS2109.

GCVideo-DVI v3.0 and later (MJPG)

GCVideo-DVI v3.0 and later (YUY2)


| Source | Lab DSSIM | RGB SSIM | RGB PSNR |
|---|---|---|---|
| GCVideo-DVI v3.0 and later (MJPG) | -18.031204 | 10.982781 | 28.875378 |
| GCVideo-DVI v3.0 and later (YUY2) | -18.259393 | 11.301660 | 28.853936 |
Datapath VisionRGB
Using AD9887A.
This range of 8-bit RGB 4:4:4 capture cards serve as our reference.

HD Retrovision SNES Component Cable 4× Oversampling ADC

EON GCHD Mk-II + Datel Wii HD Component Cable + [RetroRGB Comp2DVI v2.1]

EON GCHD Mk-II + HD Retrovision Wii Component Cable + [RetroRGB Comp2DVI v2.1]

EON GCHD Mk-II + Datel Wii HD Component Cable 4× Oversampling ADC

EON GCHD Mk-II + HD Retrovision Wii Component Cable 4× Oversampling ADC
EON GCHD Mk-II v2.4c.2 + Datel Wii HD Component Cable + [RetroRGB Comp2DVI v2.1]

EON GCHD Mk-II v2.4c.2 + HD Retrovision Wii Component Cable + [RetroRGB Comp2DVI v2.1]

EON GCHD Mk-II v2.4c.2 + Datel Wii HD Component Cable 4× Oversampling ADC

EON GCHD Mk-II v2.4c.2 + HD Retrovision Wii Component Cable 4× Oversampling ADC

Nintendo GameCube Component Video Cable + [RetroRGB Comp2DVI v2.1]

GCVideo-DVI v2.4a and earlier [1]

GCVideo-DVI v2.4b and later

EON GCHD Mk-II v2.4c.2 + HDMI Cable

GCVideo-DVI v3.0 and later


.png)

.png)

.png)

.png)


- ↑ GCVideo-DVI v2.4a and earlier has CB shifted left in the Green channel of RGB outputs.
Hauppauge WinTV-HVR-1850
Using CX23888.
This 8-bit YCBCR 4:2:2 capture card show the advantages of 3D comb filtering.
Nintendo RF Modulator (NTSC-J)

Nintendo RF Modulator (PAL-M)

Nintendo Stereo AV Cable (NTSC-J)

Nintendo Stereo AV Cable (PAL-M)

Generic S-Video Cable (NTSC-J)

Generic S-Video Cable (PAL-M)


Sound emulation
Mega Man Zero 2
Pokémon Sapphire
3D lookup table
Pokémon Sapphire

Identity LUT
lutrgb.png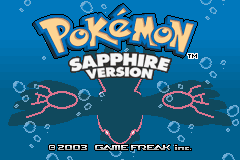
Game Boy Advance
lutrgb-gba.png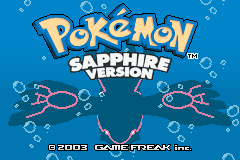
Game Boy Color
lutrgb-gbc.png
Game Boy Player Start-up Disc
lutrgb-gbp.png
Nintendo DS
lutrgb-nds.png
VisualBoyAdvance-M
lutrgb-vba.png
Wii U Virtual Console
lutrgb-wiiu.png


Color matrix
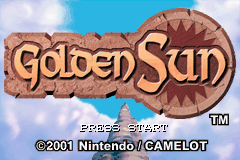
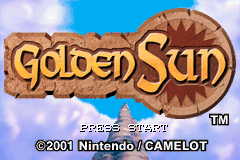
Golden Sun
Identity matrix
Game Boy Advance
Game Boy Interface
Nintendo DS
Palm Treo 700p
PlayStation Portable

VisualBoyAdvance-M


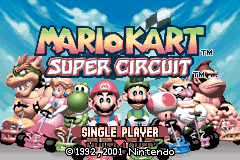
Mario Kart: Super Circuit
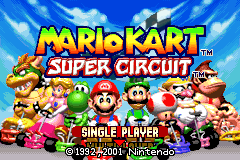
Identity matrix
Game Boy Advance

Game Boy Interface
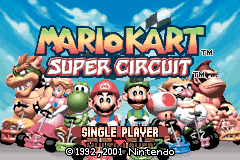
Nintendo DS

Palm Treo 700p
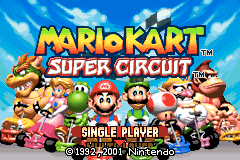
PlayStation Portable
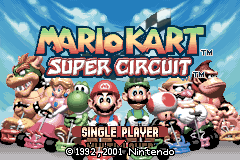
VisualBoyAdvance-M


Pokémon Sapphire
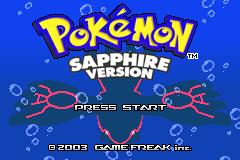
Identity matrix
Game Boy Advance
Game Boy Interface
Nintendo DS

Palm Treo 700p
PlayStation Portable

VisualBoyAdvance-M


The Legend of Zelda: The Minish Cap
Identity matrix
Game Boy Advance
Game Boy Interface

Nintendo DS
Palm Treo 700p

PlayStation Portable
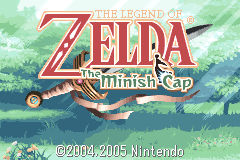
VisualBoyAdvance-M


Wario Land 4
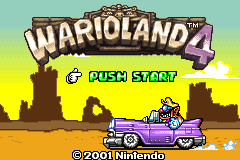
Identity matrix
Game Boy Advance

Game Boy Interface
Nintendo DS
Palm Treo 700p

PlayStation Portable

VisualBoyAdvance-M


Examples
Color emulation
Game Boy Advance

Using a contrast ratio of 250:1.
--matrix=gba
--input-gamma=4.
--contrast=.74851331406341291833644689906823
--brightness=.25148668593658708166355310093177
Nintendo DS

Using a contrast ratio of 600:1.
--matrix=nds
--input-gamma=2.2
--contrast=.94539857500845076575010909270066
--brightness=.05460142499154923424989090729934
Palm Treo 700p

Using a contrast ratio of 75:1.
--matrix=palm
--input-gamma=2.2
--contrast=.85949252616415732890698972119636
--brightness=.14050747383584267109301027880364
PlayStation Portable

Using a contrast ratio of 750:1.
--matrix=psp
--input-gamma=2.2
--contrast=.95066513192721403818280764386444
--brightness=.04933486807278596181719235613556
Color restoration
Mario & Luigi: Superstar Saga
This game reduces contrast when played with Game Boy Player enhancements.
--contrast=1.1
Super Mario Bros. 3: Super Mario Advance 4
This game reduces gamma when played without Game Boy Player enhancements.
--input-gamma=2.8
The Legend of Zelda: Oracle of Ages/Seasons
This game reduces gamma when played on a Game Boy Advance. Due to Game Boy Color limitations, only shadows can be restored perfectly.
--input-gamma=4.
Mimicking
Game Boy Interface (ultra-low latency)
--delay-reset=0
--delay-video=0
--no-overlay
--scaler=nearest
--matrix=identity
--sound=digital
--format=custom,scaled-size=528:320,size=480:320
Game Boy Player Start-up Disc (60Hz)
Included as gbisr.cli.example.
Transcribed below for reference.
--delay-video=2
--matrix=identity
--contrast=.78125
--vfilter=.5:.25:.25
--sound=analog=.000148021979839541018009185791015625:.00029604395967908203601837158203125:.000148021979839541018009185791015625:-1.965293407440185546875:.965885460376739501953125
--format=ntsc,scaled-size=666:448,size=608:448
--scan-mode=interlace
--enhance
Game Boy Player Start-up Disc (50Hz)
--delay-reset=63
--delay-video=2
--matrix=identity
--contrast=.78125
--vfilter=.5:.25:.25
--sound=analog=.000148021979839541018009185791015625:.00029604395967908203601837158203125:.000148021979839541018009185791015625:-1.965293407440185546875:.965885460376739501953125
--format=pal,scaled-size=670:530,size=608:448
--scan-mode=interlace
--enhance
Nintendo 3DS Ambassador Program
F-Zero Maximum Velocity, Fire Emblem: The Sacred Stones, Mario vs. Donkey Kong and The Legend of Zelda: The Minish Cap
--matrix=identity
--contrast=.7
--blend=.75
Kirby & The Amazing Mirror
--matrix=identity
--contrast=.6
--blend=.5625
Mario Kart: Super Circuit
--matrix=identity
--contrast=.65
--blend=.75
Metroid Fusion
--matrix=identity
--contrast=.7
--blend=.5625
Wario Land 4 and WarioWare, Inc.: Mega Microgame$
--matrix=identity
--contrast=.65
--blend=.5625
Yoshi's Island: Super Mario Advance 3
--matrix=identity
--contrast=.6
--blend=.5
Video optimization
Datapath VisionAV & VisionRGB
GCVideo-DVI v3.0 and later
These settings provide a 1× scaled image in a 4:3 640×240p119.455 video output.
In the GCVideo menu under "Other settings", set "Enhanced DVI mode" to On.
In the GCVideo menu under "Advanced settings", set "Chroma Interpolation" to On, "Fix resolution" to Off, and "Digital color format" to YC444.
--vfilter=.5:.5:.0:.5:.0:.5
--format=custom,offset=0,scaled-size=0:0
--scan-mode=non-interlace,clock2x
- Color Adjustments
- Brightness: 32
- Contrast: 128
- Colour Domain: YUV (601) Limited
Datapath VisionRGB
Nintendo GameCube Component Video Cable
These settings provide a 1× scaled image in a 3:2 240p119.455 video output.
--vfilter=.5:.5:.0:.5:.0:.5
--format=custom,offset=0,scaled-size=0:0
--scan-mode=non-interlace,clock2x
- Resolution and Refresh
- Width: 320
- Height: 240
- Vertical Refresh: 119.45
- Video Adjustments
- Horizontal Position: 85
- Horizontal Size: 433
- Phase: 27
- Vertical Position: 18
- Black Level: 245
- Cropping
- Top: 40
- Left: 40
- Width: 240
- Height: 160
- Color Adjustments
- Brightness: 32
- Contrast: 128
- Colour Domain: YUV (601)
- Colour Balance
- All Colors
- Brightness: 32
- Contrast: 128
- Red
- Brightness: 158
- Contrast: 158
- Green
- Brightness: 174
- Contrast: 142
- Blue
- Brightness: 150
- Contrast: 128
- All Colors
Open Source Scan Converter
These settings provide a 1× scaled image in a 3:2 240p59.7276 video output. Refer to FirebrandX for Open Source Scan Converter configuration.
Included as gbisr-ossc.cli, gbisr-ossc.dol+cli and gbisr-ossc.gci.
Transcribed below for reference.
--vfilter=.5:.5:.0:.5:.0:.5
--format=custom,offset=0,scaled-size=0:0
--scan-mode=non-interlace
Important: Misuse will result in the wrong aspect ratio.
XRGB-mini Framemeister
These settings provide a 1× scaled image in a 3:2 240p59.7387 video output. Refer to FirebrandX for XRGB-mini Framemeister configuration.
Included as gbisr-xrgb.cli, gbisr-xrgb.dol+cli and gbisr-xrgb.gci.
Transcribed below for reference.
--vfilter=.5:.5:.0:.5:.0:.5
--format=custom-m,offset=0,scaled-size=0:0
--scan-mode=non-interlace
Important: Misuse will result in the wrong aspect ratio.
High-definition televisions
GCVideo-DVI
These settings provide a 3× scaled image, line doubled in a 16:9 720×960i59.7188 video output.
Included as gbisr-gcdv.cli, gbisr-gcdv.dol+cli and gbisr-gcdv.gci.
Transcribed below for reference.

--zoom=2.53125:3
--format=custom,offset=+2:-2,scaled-size=0:0
--scan-mode=non-progressive
Change the Aspect Ratio on the television to 16:9.
To improve the picture further, in the GCVideo menu under "Other settings", try setting "Enhanced DVI mode" to Off. You will lose embedded digital audio.
Labeling the input on the television as a PC may also work.
These settings provide a 3× scaled image in a 16:9 720×480p59.7276 video output.
--zoom=2.53125:3
--format=custom,offset=0,scaled-size=0:0
--scan-mode=progressive
Change the Aspect Ratio on the television to 16:9.
Video output
120Hz black frame insertion
--vfilter=.5:.5:.0:.0
--scan-mode=non-interlace,clock2x
480p hybrid scanlines
--overlay=frame.tpl.gz
--gamma=2.2:1.
--scan-mode=progressive
480p simple scanlines
--vfilter=.5:.5:.0:.0
--scan-mode=progressive
Video scaling
4:3 fullscreen (Game Boy Advance)
--zoom=2.375
--vfilter=.625:.1875:.1875
--scan-mode=interlace
--zoom=2.375
--scan-mode=progressive
4:3 fullscreen (Game Boy Color)
--zoom=3
--vfilter=.5:.25:.25
--scan-mode=interlace
--zoom=3
--vfilter=.5:.5:.0:.5:.0:.5
--scan-mode=non-interlace
--zoom=3
--scan-mode=progressive
16:9 fullscreen
--zoom=2.25:3
--scan-mode=progressive
FAQs

.png)
.png)
How do I change Game Paks?
- Hold the Reset Button.
- Slide the Game Pak Ejector.
- Insert a Game Pak into the Game Pak Slot.
- Release the Reset Button.
Can I play Game Boy Advance Video?
Yes. You can do so by disabling Game Boy Player enhancements (--no-enhance, or "Rumble: No" in Swiss), or holding a direction while the Game Boy Player logo is visible.
What is the default video output?
- Interlaced Scan Mode: 1× in 4:3 720×240p59.8261 (reported by GCVideo-DVI as 704x240p60)
- Progressive Scan Mode: 2× in 4:3 720×480p59.7276 (reported by GCVideo-DVI as 704x480p60)
Why am I seeing a double split image?
Either progressive scan mode is enabled or, if using GCVideo-DVI, line doubling is by default.
If line doubling is at fault, the picture may also be scrolling with a slant.
Why is the input viewer barely visible on my capture?
If the input viewer has no discernible shape on black or white backgrounds, this is caused by a configuration issue.
If you're using analog video, set the video standard as "NTSC_M_J" rather than "NTSC_M" in the filter properties.
If you're using digital video, set the color range to full rather than partial. If this doesn't work, in the GCVideo menu under "Other settings", set "RGB Limited Range" to On.
How do I verify my Game Boy Advance ROM?
Original, counterfeit or reproduction cartridge
- Remove any accessory from the External Extension Connector.
- Hold Start + Select while the Game Boy logo is visible.
- Wait until the checksum is computed.
- Compare with No-Intro's DAT-o-MATIC.
- Press any button to continue.
EverDrive-GBA
- Turn off Quick Boot.
- Select the ROM file.
- Remove any accessory from the External Extension Connector.
- Hold Start + Select while the Game Boy logo is visible.
- Wait until the checksum is computed.
- Compare with No-Intro's DAT-o-MATIC.
- Press any button to continue.
EZ-Flash Omega
- Select the ROM file.
- Press L + A on Clean Boot.
- Remove any accessory from the External Extension Connector.
- Hold Start + Select while the Game Boy logo is visible.
- Wait until the checksum is computed.
- Compare with No-Intro's DAT-o-MATIC.
- Press any button to continue.
How do I re-enable the dumping utility?
Pass default.mb.gz as command-line argument.
Changelog
January, 2021
- Added all devices search for GBI directory.
- Updated GBA-as-GC controller.
- Improved GBA multiboot support.
December, 2020
- Added return to loader support.
- Updated color matrices by Pokefan531.
- Updated 3D LUTs by Pokefan531.
- Improved system stability.
- Improved SD card compatibility.
- Changed default video format to avoid PAL-M with digital AV.
- Changed default 3D LUT order to GBR.
May–June, 2020
- Added control type E.
- Added disc spin-down.
- Added GC Loader read-only support.
April, 2020
- Changed default color matrix to GBI's original.
- Changed default sound mode to analog.
- Fixed Game Boy Player settings validation.
January–March, 2020
- Improved SD card compatibility.
- Reduced reset delay.
October, 2019
- Added N64 Controller support.
- Added GBA anti-sleep mode.
- Added subfolder search for GBI directory.
August–September, 2019
- Added Game Boy Player settings validation.
- Fixed default SD card with bad program name.
July, 2019
- Added SD2SP2 support.
- Fixed hang with no SD card inserted.
- Fixed hang upon SD card reinsertion.
June, 2019
- Improved video rendering.
- Renamed oversample scaler to area.
- Changed default scaler to area.
May, 2019
- Added GBA ROM checksummer.
- Added 960i and 1152i video modes.
April, 2019
- Fixed fade with background color set.
- Fixed a power issue.
- Enabled USB Gecko standard output.
March, 2019
- Updated color matrices by Pokefan531.
- Updated 3D LUTs by Pokefan531.
- Fixed Super Game Boy password order.
- Fixed NTSC 50 composite video.
August, 2018
- Updated color matrices by Pokefan531.
- Updated 3D LUTs by Pokefan531.
July, 2018
- Updated GBA-as-GC controller.
- Disabled component video DAC oversampling.
June, 2018
- Added analog sound emulation.
- Added Custom-M video format.
- Added Custom interlaced video modes.
- Merged vertical filter controls.
- Changed brightness/contrast controls to match BT.1886.
- Fixed some audio bugs.
- Enabled progressive scan in more cases to prevent display issues.
May, 2018
- Added Super Game Boy color palette setting.
- Changed scan mode semantics.
- Fixed Game Boy Player advertisement.
- Fixed rumble protocol handshake.
April, 2018
- Added movie recording/playback.
- Updated GBA-as-GC controller.
March, 2018
- Added control swapping for SNES Controllers.
- Added framebuffer size/offset setting.
- Replaced sample aspect ratio with scaled size.
- Improved per-field filtering in single-buffered mode.
- Improved multiboot implementation.
- Improved Game Boy sound quality.
- Improved audio rendering.
- Reduced audio latency.
- Fixed SD card compatibility.
- Fixed multiboot to rumble protocol transition.
- Disabled default multiboot.
February, 2018
- Added background color setting.
- Added video buffering setting.
- Added input viewer.
- Added color matrix from Gambatte.
- Added mono sound mode.
- Added 3D LUT auto-generation.
- Added GBR/BGR LUT order support.
- Added per-field gamma correction control.
- Changed some argument semantics.
- Fixed per-field settings with default video mode.
- Fixed wiiload autoboot with tiny GBA multiboot ROMs.
- Disabled machine checks.
January, 2018
- Updated 3D LUTs by Pokefan531.
- Improved Game Boy Player driver.
- Changed default component video modes.
- Tweaked control type C.
September, 2017
- Added overlay scale setting.
- Added Logitech Speed Force support.
- Added Active Life Mat support.
- Improved Game Boy Player driver.
- Changed zoom scale.
- Changed wiiload server to accept oversized DOLs.
- Fixed one random kernel crash.
- Fixed scaling without a 3D LUT.
August, 2017
- Added DK Bongos support.
- Adapted control type C for Super Mario World: Super Mario Advance 2.
- Added control type D for The Legend of Zelda: A Link to the Past.
- Added per-field vertical filter control.
- Added PNG 3D LUT support.
- Added LUTs by Pokefan531.
- Added LUTs from the 3DS Virtual Console.
- Improved Game Boy Player driver.
July, 2017
- Added CLI append support.
- Updated GBA-as-GC controller.
- Changed reset combo behavior.
June, 2017
- Added zoom & rotate.
- Added reset delay.
- Added reset combo.
April, 2017
- Added component video DAC oversampling.
- Added reset fade effect.
- Added TPL overlay support.
March, 2017
- Added rumble, disabled by default.
- Added USB Gecko wiiload server.
- Added Xboo Communicator.
February, 2017
- Added volume control.
- Added per-channel settings where possible.
- Changed volume to 75% to mitigate clipping.
November, 2016
- Updated GBA-as-GC controller.
September, 2016
- Added video options.
- Added control schemes.
- Added polling rate setting.
May, 2016
- Updated GBA-as-GC controller.
- Improved Game Boy Player driver.
- Fixed WaveBird Controllers.
April, 2016
- Replaced GBA-as-controller with GBA-as-GC controller.
March, 2016
- Added U+D/L+R cancelling.
- Added GBA-as-controller support.
- Recognized a half press of the analog triggers.
August, 2015
- Added executable compression.
- Added memory card distribution files.
- Reduced coil whine.
July, 2015
- Fixed Game Boy Player detection.